The Service consists of several sections which the Documentation follows according to the hierarchy:
1. Records
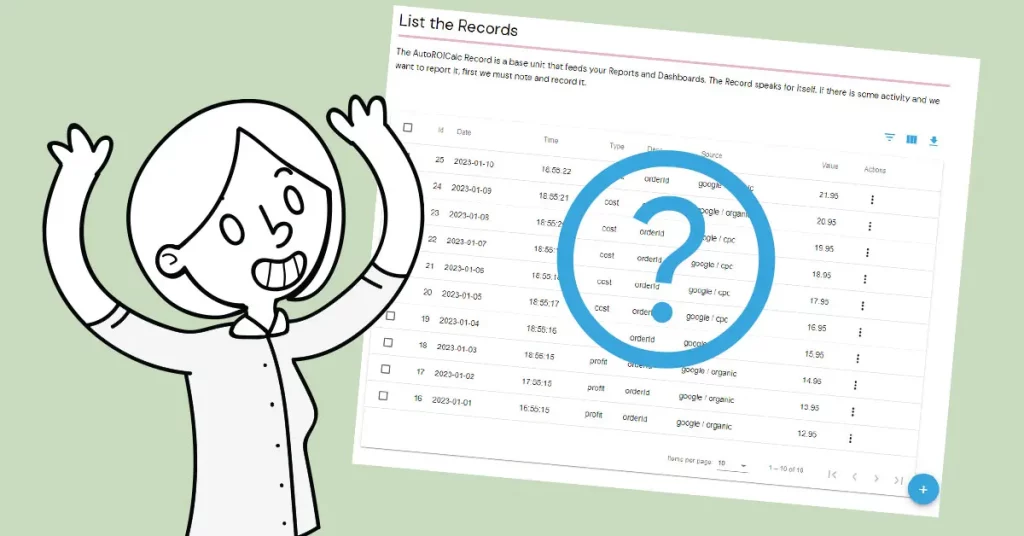
The AutoROICalc Record represents a fundamental element to fulfill the purpose of the Service. It records an activity that is intended to be used for reporting.
1.1 List the Records
This section simply lists the Records that are already present within the User Account. The listed records are shown in a data table. Each table row has its Action button. These actions are available after clicking on the Action button:
- Edit. Opens the Record for editing.
- Delete. Deletes the selected Record.
1.1.1 Filter Records
A Filter is available for listing the Records. In order to use it, find and click on the “Filter” icon that is located above the table on the right. Several options are available for filtering. Input the preferred criteria and click on the “Filter Records” button to use the Filter. To remove the Filter, click on the “Filter” icon again or click on the “Cancel” button.
1.1.2 Show/Hide the Records List table columns
To get a better view of the Records List data table, there is a possibility to hide undesired table columns. Find and click on the “Show/Hide columns” icon that is located above the table on the right. Check or uncheck preferred columns.
1.1.3 Export Records
There may be a need for example to backup the Records of a User Account or to process the Records outside the AutoROICalc Service. In this case, the User can export his Records into various formats.
At this time, CSV and XML export format is available. Find and click on the “Export / Download” icon that is located above the table on the right. Choose and click on the preferred export format. Please note that only visible data are exported.
This is a sample CSV export:
id,date,time,type,desc,source,value
1,2021-07-27,16:55:15,profit,orderId,google / organic|any,12.95
2,2021-07-28,17:55:15,profit,orderId,google / organic|any,13.95
3,2021-07-29,18:55:15,profit,orderId,google / organic|any,14.95
This is a sample XML export:
<?xml version="1.0"?>
<records>
  <record>
    <id>1</id>
    <date>2021-07-27</date>
    <time>16:55:16</time>
    <type>profit</type>
    <desc>orderId</desc>
    <sources>
      <source>google / organic</source>
      <source>(direct) / (none)</source>
    </sources>
    <value>13.27</value>
  </record>
  <record>
    <id>2</id>
    <date>2021-07-28</date>
    <time>17:00:00</time>
    <type>profit</type>
    <desc>orderId</desc>
    <sources>
      <source>google / cpc</source>
      <source>google / organic</source>
    </sources>
    <value>15.27</value>
  </record>
</records>
1.2 Add Records
There are various ways how to add Records to the User Account. Records can be added manually, imported from CSV or XML file, or via API. This should satisfy each possible scenario of the User workflows.
1.2.1 Add a Record Manually
In this section, the Record can be added manually by filling the required fields:
- Date. The date of the activity to be recorded. The date should be provided in DD-MM-YYYY format. Users can input the date or can use the date picker by hitting the “space” keyboard button if the date field is focused. It is also possible to quickly set the date of “today” by clicking on the “calendar” icon that is located on the right of the date field.
- Time. The time of the selected date (day) in HH:MM format. The same functionality as in the case of the Date applies for this field. Users can input the time or use the time picker by hitting the “space” keyboard button if the time field is focused. To set the current time, Users can click on the “alarm” icon that is located on the right of the time field.
- Type. The User´s selected Record type. Please refer to the Basic Concepts and Best Practices in order to learn about the AutoROICalc Record types.
- Description. A brief description of the Record, some additional information, or some identifier. For example, the transaction or customer order id.
- Source(s). The User´s selected Record source. Please refer to the Basic Concepts and Best Practices in order to learn about the AutoROICalc Record sources.
- Value. The value of the Record.
If there are all the required data provided, the User can Save the Record by clicking on the “Save the Record” button. The field values validation happens after saving the record. Possible warning or error messages should be shown if applicable, to guide the User to correct the input data.
1.2.2 Import from CSV
This section allows importing the AutoROICalc Records from CSV. The CSV for import must contain a header file, then each next line represents a single Record. The Record sources are separated with the | character. If there is only one Record source, the separator is not necessary.
This is a sample CSV for the import:
date,time,type,desc,source,value
2021-07-27,16:55:15,profit,orderId,google / organic|any,12.95
2021-07-28,17:55:15,profit,orderId,google / organic|any,13.95
2021-07-29,18:55:15,profit,orderId,google / organic|any,14.95
1.2.3 Import from XML
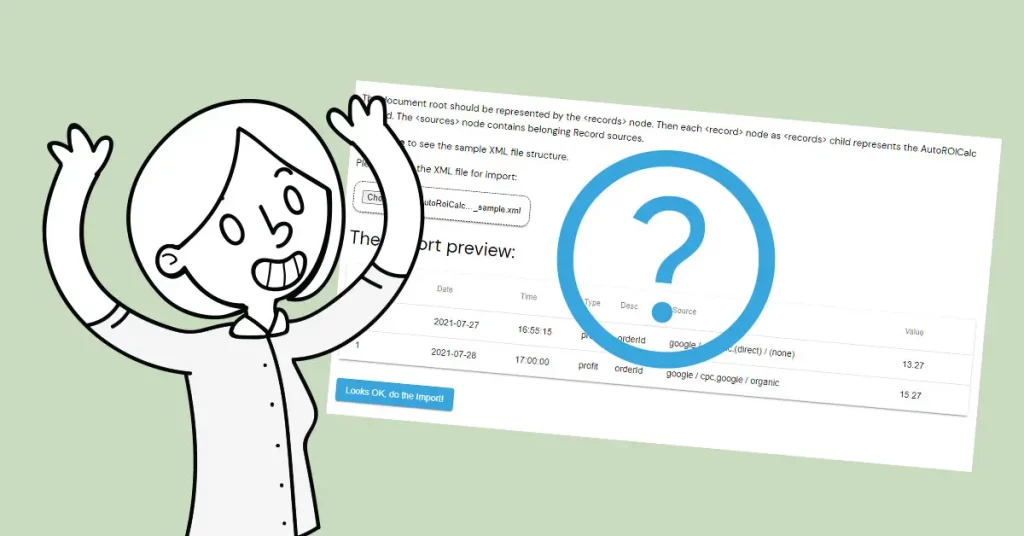
This section allows importing the AutoROICalc Records from XML. The document root should be represented by the <records> node. Then each <record> node as <records> child represents the AutoROICalc Record. The <sources> node contains belonging Record sources.
This is a sample XML for the import:
<?xml version="1.0" encoding="UTF-8"?>
<records>
  <record>
    <date>2021-07-27</date>
    <time>16:55:16</time>
    <type>profit</type>
    <desc>orderId</desc>
    <sources>
      <source>google / organic</source>
      <source>(direct) / (none)</source>
    </sources>
    <value>13.27</value>
  </record>
  <record>
    <date>2021-07-28</date>
    <time>17:00:00</time>
    <type>profit</type>
    <desc>orderId</desc>
    <sources>
      <source>google / cpc</source>
      <source>google / organic</source>
    </sources>
    <value>15.27</value>
  </record>
</records>
1.2.4 Use API
Please refer to the API section.
1.3 Explore the Records-related tutorials
- Adding your first Record

- How to import Records from CSV?

- How to import Records from XML?
- Managing your Records
- How to manage Records using API: PHP sample code

- How to manage Records using API: JavaScript/Node.js sample code

- How to manage Records using API: Python sample code

2. Reports
The AutoROICalc Report represents the selected Records development for a certain time period. To learn more about the AutoROICalc Report, please refer to the Basic Concepts section.
2.1 List the Reports
This section simply lists the Reports that are already present within the User Account. The listed reports are shown in a data table. Each table row has its Action button. These actions are available after clicking on the Action button:
- View. Opens the Report view.
- Edit. Opens the Report for editing.
- Delete. Deletes the selected Report.
2.1.1 Filter Reports
A Filter is available for listing the Reports. In order to use it, find and click on the “Filter” icon that is located above the table on the right. Input the preferred criteria and click on the “Filter Reports” button to use the Filter. To remove the Filter, click on the “Filter” icon again or click on the “Cancel” button.
2.2 Create a New Report
The AutoROICalc Reports are created in this section. The Report configuration is divided into several sections, which are separated using the tabs, to make the configuration as clear and easy as possible:
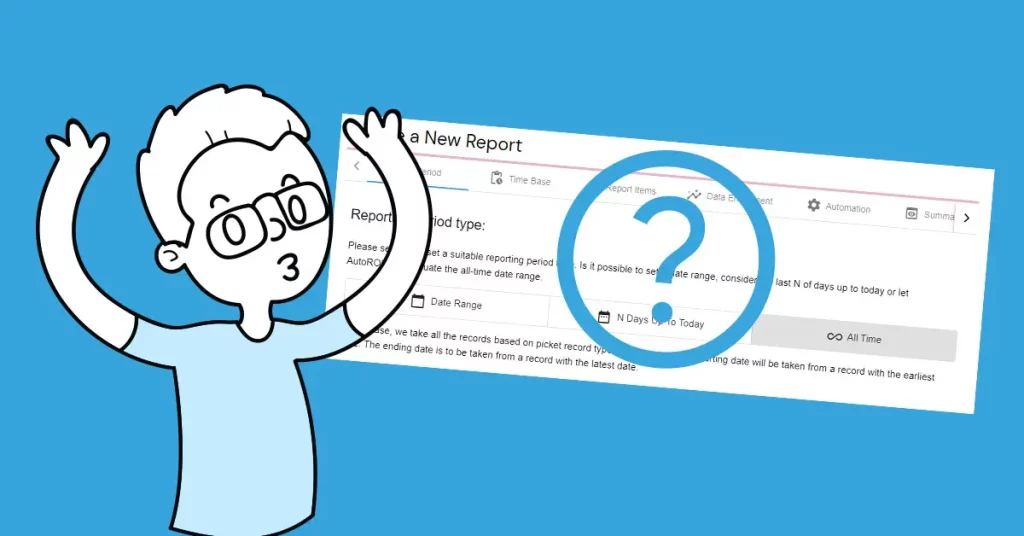
2.2.1 Report Period
Reporting period type. This is crucial for how the Report time period will be set. There are three options:
- Date from-to. With this option, the User will set a fixed time period for the Report.
- N days up to today. With this option, the inputted days up to today will be considered.
- All time. This option will set the time period according to the first (oldest) and last (newest) Record time and date.
2.2.2 Report Time Base
The reporting time base represents a particular time period, a data point of the Report chart. The particular Record values of configured Record types and sources are calculated and reported. These are the available time bases:
- Year. This applies only if the reporting time period is several years. The corresponding Records are collected and calculated per year resulting in a chart and a Report table, where the development of the particular activity can be seen.
- Month. This applies only if the reporting time period is several months. The corresponding Records are collected and calculated per month resulting in a chart and a Report table, where the development of the particular activity can be seen.
- Week. Applies the same description as per Year or Month above. The Week is considered as the calendar week. A calendar year consists of 52 weeks. In the case of setting this time base, according to reporting period set, you will get the calculations per calendar week 1, week 2, and so on.
- Day. The corresponding Records are collected and calculated per day.
- Hour. The corresponding Records are collected and calculated per hour. Please consider the length of the time period for this time base. Otherwise, the Report may be cluttered.
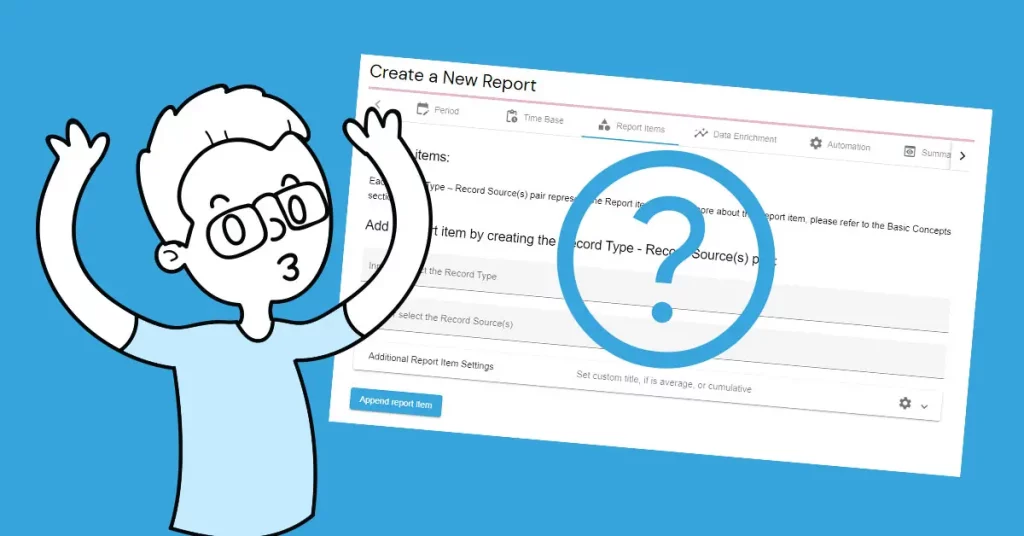
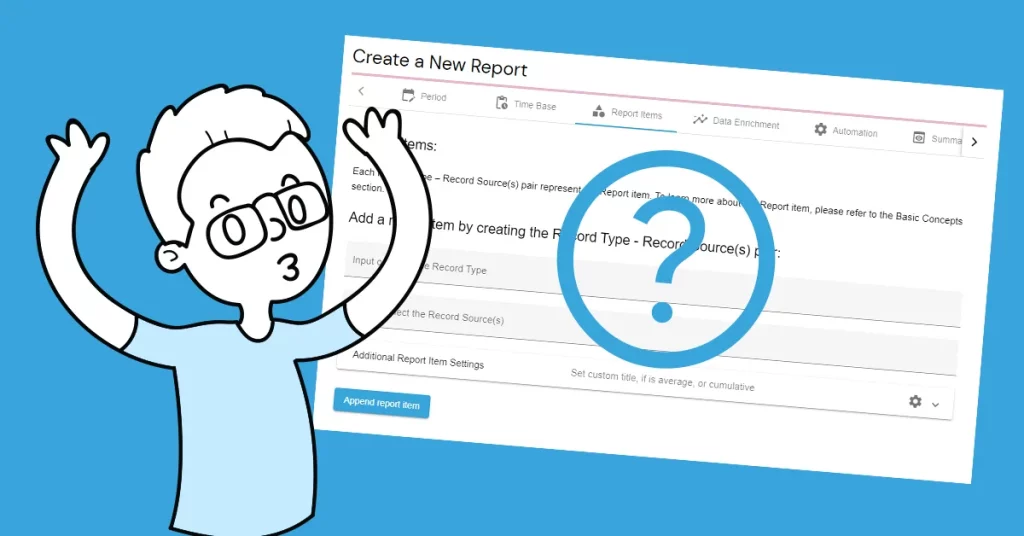
2.2.3 Report Items
The User should continue with the Report items. Each Record Type – Record Source(s) pair represent the Report item. To learn more about the Report item, please refer to the Basic Concepts section.
- Record type. Records with the inputted Record type will be selected per the Report item.
- Record Source(s). The Record sources per inputted Record type. The User can input the full string of the desired Record source, or a substring – in this case, each Record source that contains the substring will be considered.
There are a few special options that the User should be aware of:
- AutoROICalcAllSources. Selecting this special option in the case of Record Source(s) will include all the Record sources per inputted Record type.
- Selected record sources colors. The User can set a preferred color per each selected record source. This can be done by clicking on the gray circle that is located on the right of the source item.
The Report item’s title is given according to the mentioned Record Type – Source pair. There is an optional input for a custom Report Item title. We recommend using this along with the “Hide source” switch to achieve the best possible clarity of the Report view.
Please note that the corresponding Record values (dependent on the Report Period, Time Base, etc.) are summed up by default. Please review the additional Report Item calculation:
- AVERAGE: Whether to calculate values average instead of sum (the default one).
- CUMULATIVE: Whether to calculate results as cumulative.
Engage these calculations by switching them on/off.
Once everything is per a Report Item perfectly set, click on the “Append report item”.
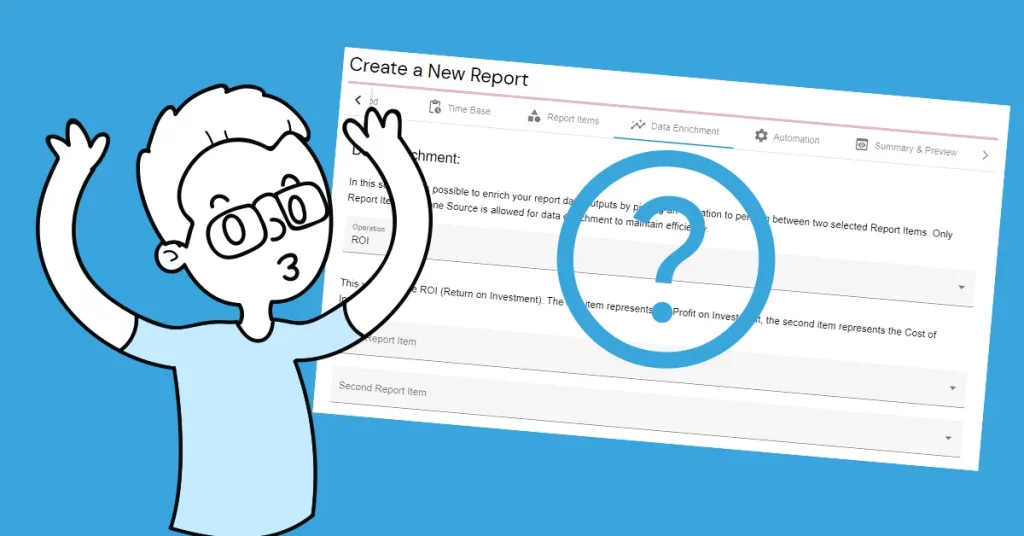
2.2.4 Data Enrichment
In this section, it is possible to enrich your report data outputs by picking an operation to perform between two selected Report Items. Only Report Items with one Source are allowed for data enrichment to maintain efficiency.
The User should be intuitively navigated through this section in order to append desired Data Enrichment Items.
Currently available Data Enrichment operations are:
- ROI
- Add
- Subtract
- Cost per Conversion
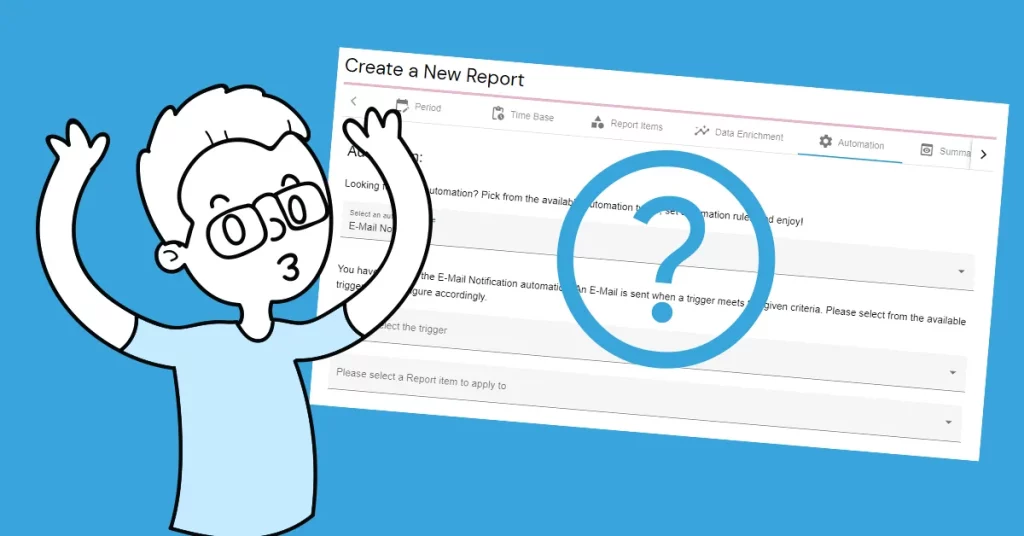
2.2.5 Report Automation
This section allows setting any of the automation that is available for the Reports. Again, the User is guided intuitively within the section.
Currently available Report Automation types are:
- E-Mail notification.
- Report Update.
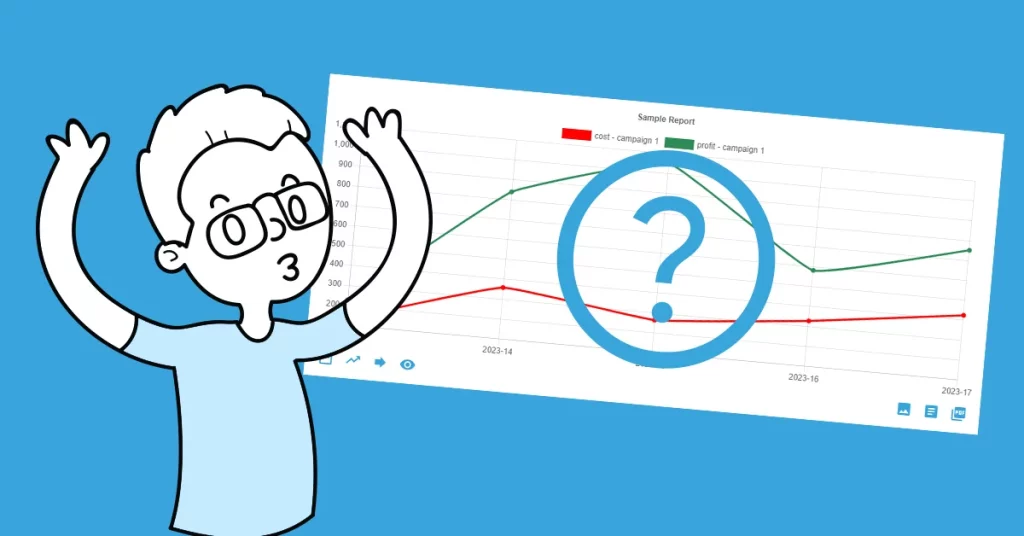
2.2.6 Summary & Preview
The summary and preview, finally. The report name should be inputted in this section. If there is no error, a “Preview the Report” button is available to get the Report Preview. The “Save the Report” button is available under the Report Preview.
2.3 Explore the Reports-related tutorials
- Creating your first Report
- Selecting the right reporting period type
- Selecting the right reporting time base. How does it relate to period type?

- On Adding the Report Items
- Additional Report Item Settings

- Data Enrichment
- Report Automation
- The Report View anatomy explained
3. Dashboards
The AutoROICalc Dashboard represents a view of selected Reports. Usually, the Reports are related to each other.
3.1 List the Dashboards
This section simply lists the Dashboards that are already present within the User Account. The listed dashboards are shown in a data table. Each table row has its Action button. These actions are available after clicking on the Action button:
- View. Opens the Dashboard view.
- Edit. Opens the Dashboard for editing.
- Delete. Deletes the selected Dashboard.
3.1.1 Filter the Dashboards
A Filter is available for listing the Dashboards. In order to use it, find and click on the “Filter” icon that is located above the table on the right. Input the preferred criteria and click on the “Filter Dashboards” button to use the Filter. To remove the Filter, click on the “Filter” icon again or click on the “Cancel” button.
3.2 Create a New Dashboard
The AutoROICalc Dashboards are created in this section. The existence of at least two Reports is assumed. There are several simple steps to create a new Dashboard, divided into tab sections.
3.2.1 Pick the Reports
Pick the Reports that are desired to be included in the Dashboard from the list of the Reports present within the User account.
3.2.2 Schedule E-Mail Reporting
This section allows the User to configure scheduled e-mail reporting by switching on the “Enable E-Mail Reporting” switch. The e-mail report is sent to the e-mail address of the User account by default. The User can optionally add other e-mail addresses to send the Dashboard copies to.
In case the e-mail reporting is turned “on”, it is important to configure the reporting frequency. These fields are used for this:
- Select e-mail reporting frequency. Whether the e-mail reporting should be:
- Daily.
- Weekly.
- Monthly.
- Select a time of the day. At which time of the day should be the Dashboard sent.
- Select a day of the week. This applies only if the reporting frequency is set to Weekly.
- Select a day of the month. This applies only if the reporting frequency is set to Monthly.
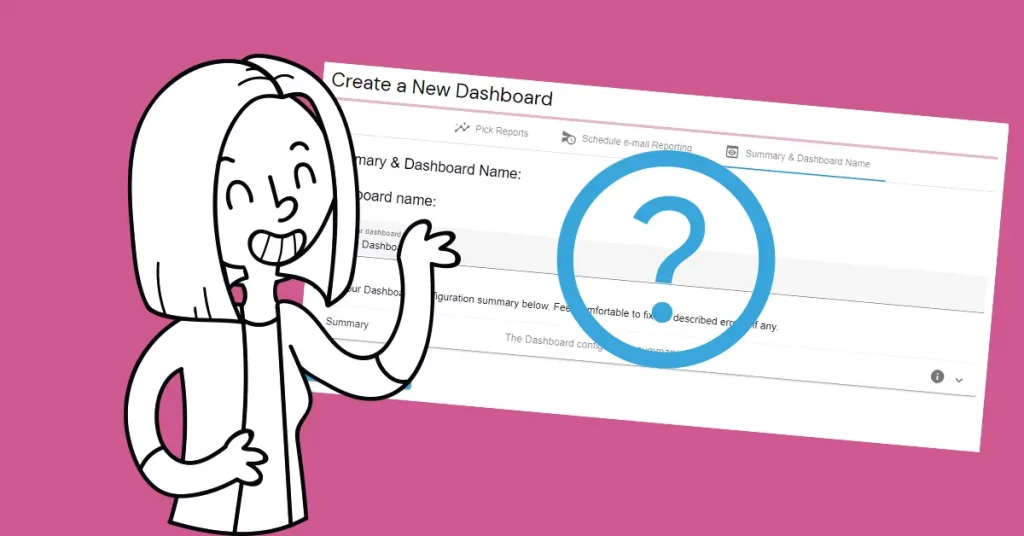
3.2.3 Summary & Dashboard Name
This section guides the User through the Dashboard configuration, showing the errors to fix if any. This section also asks the User to input the Dashboard name in order to finish and save the Dashboard configuration.
3.3 Explore the Dashboards-related tutorials
4. Account
This section contains information about the User Account.
4.1 Account Information
This page informs about the User´s Service Plan, Records, Reports, and Dashboards usage and limits and it informs about the activated Features.
4.2 Settings
This section allows adjustment of the available settings that are taken into effect within the User account.
4.2.1 E-mail settings
In this section, you can set custom SMTP settings used for scheduled e-mail reporting. Using the SMTP within your organization contributes to better e-mails delivery to your mailboxes. In order to do so, check “Enable custom E-mail settings”, fill in the required fields, “Validate” your settings, and then click on “Save” or “Update”.
4.2.2 PDF Template
The User is free to adjust the Report PDF template just according to his tastes in this section. Please note that a default template is used if these settings are not applied. The final PDF template should comply with the User´s organization branding. Customization is possible by adjusting and setting the fields that are available within this section. A template preview is available to get a better view and comfort while setting the adjustments.
4.3 Integrations
The aim of AutoROICalc is to eliminate all the “painful” manual stuff. The Integrations bring together various types of software services to create a single unified system. The Integrations are developed and provided according to the demand of the AutoROICalc Users.
The Integrations section consists of two parts. The first part is a card-styled list of the integrations that are available for use. The second part lists the active scheduled imports of the integrations.
There are two options with the available integration of external services. Either import the desired data per a certain time period manually or set automated imports on a daily scheduled basis. Save time and know what you’re up to effortlessly.
4.3.1 Facebook Ads Manager
As we know, the Facebook Ads Manager is a starting point for running ads on Facebook, Instagram, Messenger, and the Audience Network of Facebook. With AutoROICalc, it is now possible to get and report the performance of the ads automatically based on a daily schedule.
There are three options in the Facebook Ads Manager integration “card”:
- Connect. This is the mandatory step in order to use this integration. While taking this action, the User is redirected to Facebook where he confirms the authentication.
- Revoke. This action is available only if the connection (integration) exists. It revokes the integration.
- Import data. This action is available only if the connection (integration) exists.
- The process of importing the data from Facebook Ads Manager should be intuitive.
- The first step is selecting the Facebook Ad Account of the connected Facebook profile.
- After the Facebook Ad Account selection, there are a few more entries appeared.
- The User decides if he wants to import insights from the Ad Account or Particular Campaign.
- The target Facebook Campaign should also be selected in case of a Particular Campaign option.
- In the next step, the User decides if he wants to make a one-time manual import or to schedule the importing on a daily basis.
- There are insight fields listed that are available for import. The User simply checks the desired ones which should be imported. This is the full list of the Facebook Marketing API fields: https://developers.facebook.com/docs/marketing-api/insights/parameters/v10.0
- The last step before fetching the data for preview is to input the imported Records Source and to map the Record Types. These are pre-filled with default values. Please see the Best Practices to know more about the AutoROICalc Record Types and Sources.
- Based on the previous configuration and after the User decides the previewed fetched data are all right, the User can execute the manual import or save the configuration to scheduled imports.
The Facebook Ads Manager active scheduled imports are listed in the second part of the Integrations section. Particular scheduled import can be deleted by clicking on the “delete” button.
4.3.2 Google Analytics
Google Analytics is a web analytics service offered by Google that tracks and reports website traffic. With AutoROICalc, it is now possible to get crucial data from Google Analytics based on a daily schedule.
There are three options in the Google Analytics integration “card”:
- Connect. This is the mandatory step in order to use this integration. While taking this action, the User is redirected to Google where he confirms the authentication.
- Revoke. This action is available only if the connection (integration) exists. It revokes the integration.
- Import data. This action is available only if the connection (integration) exists.
- The process of importing the data from Google Analytics should be intuitive.
- The first step is selecting the Google Analytics Account, the Account Property, and a View (Profile).
- Once these inputs are set, the User decides if he wants to make a one-time manual import per a certain time period or to schedule the importing on a daily basis.
- The Google Analytics Metric and Dimension pair must be set per single import. For example ga:sessions as Metric and ga:sourceMedium as Dimension.
- Usually, the Metric is the AutoROICalc Record type and the Dimension is the AutoROICalc Record source. For this case, the User is allowed to input a custom AutoROICalc Record type for better Records handling within his User Account.
- See the Best Practices to know more about the AutoROICalc Record Types and Sources.
- After fetching the data for preview purposes there is an option to save the configuration to scheduled imports or to import the fetched data in case of manual import.
The Google Analytics active scheduled imports are listed in the second part of the Integrations section. Particular scheduled import can be deleted by clicking on the “delete” button.